



 Staff Writer
 Roll a fatty and get a fresh cup of coffee brewed before you journey forth 🙂
By now, you’ve probably heard decarboxylation mentioned somewhere along the road and you’re likely curious to know a bit more, right?. So, what exactly does it mean to ‘decarb’ something and how does it apply to cannabis? These are both questions that will be answered during the course of this article – I’ll even show you how its done!
This will be a relatively short post, but as per always, my recommendation is to roll a fatty and get a fresh cup of coffee brewed before you journey forth 🙂
What Does Decarboxylation Mean?
In a nutshell decarboxylation is a chemical reaction that removes a carboxyl group, releasing carbon dioxide in the process.
Typically, decarboxylation refers to a reaction of ‘carboxylic acids’, where a carbon atom is removed from a ‘carbon chain’.
This reaction is basically the reverse of the very first step that occurs during photosynthesis referred to as ‘carboxylation’, which is the addition of carbon dioxide (CO2) to a compound. With me so far? Don’t stress too much if the chemistry doesn’t make sense, the part more relevant to your endeavors is still coming.
Why ‘Decarbing’ Your Cannabis Is Important
So why is it so important to undergo the process of decarboxylation when it comes to cannabis consumption?
Well, simply put, the cannabis buds/flowers/trim/shake (or whatever you are interested in consuming from the magical plant) are not yet in the right chemical state to be consumed with the desired after-effect of getting grilled.
Soooo, yeah, all of those movies and TV shows where ‘that guy’ eats a bag of weed before the authority figure arrives, then gets blasted as a result, is a load of Holywood bullsh*t. Figures, right.. anyway.. ‘rant over’…
Essentially cannabis flowers contain a precursor for ‘THC’ (Tetrahydrocannabinol – the active compound that gets you stoned) in the form of ‘THCA’ (Tetrahydrocannabinolic Acid). Given that THCA is not yet in its psychoactive form, a chemical reaction needs to take place in-order-to convert it into THC before it can be consumed for the desired effect.

But I Never Decarb Before I Smoke, And It Always Works, WTF Are You Talking About??
This is something that I hear allot when discussing the process of cannabis decarboxylation, and to be fair, it is not a bad question to ask. I personally feel that asking a question (regardless of what it may be – within reason) is how we keep curiosity alive, and keep knowledge passing on. Objective, critical thinking is a skill-set, and curiosity is what drives us to ask the right questions. So, stay curious, and objective!
To answer the question: In short, the process of converting THCA into THC is achieved by adding heat to the cannabis before it is consumed. This occurs naturally when you smoke cannabis, given heat is used in the form of an open flame to combust said super-herb.
So, now that you know that you have actually been decarbing your cannabis this whole time (albeit a somewhat clandestine undertaking) while smoking, we can move on to explaining how to undergo the process of decarboxylation for cannabis edibles.
The Decarboxylation Process: For Cannabis Edibles And/Or Topicals
The aim of this exercise is to prepare your cannabis material for oral consumption, effectively converting the precursor (THCA) into a psycho active compound (THC).

Gear Needed To Get Started:
We’ll need to get some items together before we move ahead, but don’t panic, this is a relatively simple process, with mostly common household items being used to achieve the end result. So with out any further ado, let’s move on to getting what we need:
- Cannabis Flowers / Trim / Shake.
- A flat baking tray – or multiple, if you’re really on a mission today!
- An Oven.
- An Oven Thermometer (Not Mandatory, But Highly Recommended).
- Enough Parchment Paper To Cover The Baking Tray(s)
First Things First
Before we dive right in to getting started with our mission to decarb our cannabis we need to get some ‘grunt work’ done first. In the meantime, you might as well get your oven started, preheating to 104.444°C / 220°F. If you would like to attempt to preserve more terpenes then it is advisable that you operate at a lower temperature, and run the process for longer.
While your oven is heating up, get your baking tray(s) prepped by allocating enough parchment paper to cover the bottom of said tray(s). With your tray(s) lined, break up your cannabis material (do not grind, this is not advisable as it may compromise the quality of your end product) scattering it carefully and evenly over the parchment paper so that it is as well disbursed as possible.
Decarbing The Cannabis
With all the grunt work done, it is time to let machines take over and handle the rest of the heavy lifting.
Check your oven temperature and make sure it is not too hot, keeping in mind that terpenes, THC and CBD will all degraded rapidly if the temperatures exceed the recommended upper limit of 105.556°C (240°F). Keep in mind that home ovens all vary widely in their ability to be set to an accurate temperature level,which is why I recommend making use of an oven thermometer – this will afford you an opportunity to get a more reliable temperature reading before you move ahead with baking all that valuable bud!
Now that the temperature is not too hot, and not too cold, we can move ahead with placing the tray(s) of cannabis material into the oven. Once the tray(s) are nested in, we are going to want to let the cannabis material ‘decarb’ for at-least 45 minutes. Longer is better, especially if you are opting to operate under lower temperatures to preserve your terpenes as described earlier, however, if time is an issue, then it is best for you to stick to the “104.444°C / 220°F for 45 minutes” procedure – this will likely yield the best possible result given the restrictive time-frame your product needs to be produced in.
I (highly) recommend that you keep an eye on the process, if not constantly then at-least check back every 10 minutes or so. This really should be common ‘kitchen practice’ for a wide range of reasons which I wont rant about right now, instead let’s rather concentrate on the single fear we can all undoubtedly relate to –> Overheating the cannabis, evaporating (or even combusting) the active ingredients (THC and CBD) along with all your precious terpenes, pretty much rendering an entire batch of cannabis ‘useless’! How much would that suck!!
Were Finished!
After your ‘carefully watched’ cannabis has been decarbing for long enough then you can remove the tray(s) from your oven and let them cool down… At this point, you have completed your decarboxylation mission, now its time to start thinking about what comes next 🙂
BONUS: What Be Done With Decarboxylated Cannabis?
I wish I could come out and say: Okay peeps, so here’s my complete list of ‘what can be done with decarbed cannabis’, however, the way the market and enthusiasts have reacted to cannabis makes for an extremely diverse array of edible and topical products that will quite literally blow your mind! So, a complete list would be a Herculean task to say the very least, with that said, I figured the least I could do is give you 2 good examples. These examples should help to get the creative juices in your head flowing, which with some luck, might mean that the range of cannabis goodies will diversify even further 😉
Example 1: Cannabutter
Cannabutter is a great recipe that includes the infusion of decarbed cannabis, I really like this option since it is a general building block for many traditional recipes that could use an extra kick. Not to mention that you can literally just spread this on some toast or use it on your sandwiches for a more interesting outcome 🙂
If you would like to know a bit more then check out this cannabutter recipe.
Example 2: Cannamilk
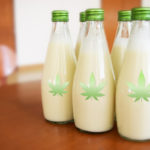
Yet another ‘funtastic’ option when it comes to consuming decarbed cannabis. This is a cannabis – milk infusion that can be used in many recipes just like cannabutter and can also be enjoyed more simple ways the same. Strawberry Quick with a Kick, anyone?
Here is a great cannamilk recipe for you to try out.
That’s it for now, just remember to keep an eye on your temperatures – happy baking all, thanks for reading!




GIPHY App Key not set. Please check settings