



 Staff Writer
 The screen of green (scrog) technique is especially useful when the number of plants is restricted or available grow space is limited; Helping you to squeeze the most out of your light source.
Welcome to part 5 of our series on cannabis training techniques; In this post, we intend to cover the basic principles behind a process called Screen Of Green, sometimes referred to as scrOG.
If this is your first visit, don’t forget to take a look at some of the previous posts that cover other cannabis training techniques such as topping, fimming, low-stress training (LST) and even super cropping!
Diverging slightly from the recent methods in this series, scrog involves a small DIY component; The screen itself needs to be fabricated before the method can be performed. Not to worry, building one to use in your screen of green setup is simple 🙂
Cannabis Plant Training Technique #5: Screen Of Green (scrOG)
I am happy to finally be writing about scrog’ing! This seemingly complicated training technique is actually remarkably manageable once you have a handle on the fundamentals, not to mention the fact that it gives growers the opportunity to develop more of a “hands-on” relationship with their plants.
Something worth mentioning before we start: It’s favourable to kick things off by either topping or fimming your plants, then scrog’ing them after they have had the chance to “bounced back”. This way, the plants can produce more “main stems” for you to weave through the screen.
- Find more info on topping cannabis plants here.
- Find more info on fimming cannabis plants here.
What is Screen Of Green, And Why Do It?
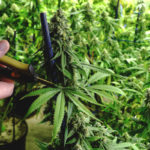
In short, Screen Of Green (or scrOG) is a cannabis plant training technique that involves the application of a mesh screen which acts as a horizontal trellis for your plant’s upper canopy.
Over time, the plant is systematically fed/weaved through the abovementioned screen, which helps to flatten it out and to widen the canopy. This supplementary canopy control furnishes the possibility to deliver a much more generous (and often more potent) yield.
- The resulting appearance is a lovely flat, yet lush screen of green foliage, ready to produce some top-shelf colas 🙂 Hence the name; “Screen Of Green“.
The screen of green (scrog) technique is especially useful in such a case where the number of legally grown plants is restricted or available grow space is simply limited; Essentially, It helps you to squeeze the most out of your light source. Just think of how much more efficient the photon harvesting will be with a nice, flat, scrOG’d canopy!
Keep in mind: This method does require a longer vegetation period compared to the other training techniques contemplated so far in this series. With that said, If you do want to fully take advantage of this process, then an indoor grow where light cycles can be controlled would be your best bet, otherwise, be sure to plant nice and early just as the vegging season starts so that you get as much growth as possible before the flowering season arrives 😉
- Autoflowering seeds are not recommended for scrog’ing due to the limited vegetation period influenced by the plant’s genetics. Now, make no mistake; I am not saying that it is impossible to scrog an autoflowering strain, in fact, if you decided to google it you will surely see a few success stories – I am just saying that it is more difficult to get decent results from this technique using auto’s over and above others methods like LST as an example. Advanced growers seem to have a handle on it, but it is definitely not recommended for beginners – so make your own judgement call here 🙂
How To Perform Screen Of Green On A Cannabis Plant
Before we get inaugurated with our screen of green training, we will first need to fashion (or find) the actual screen that will be used. This little DIY exercise will be relatively mere to undertake – Keep in mind that it mostly serves as “general guidelines” of what is required to build a “half-decent” screen.
- You are encouraged to modify the design to better suit your skillset and available tools or materials. Please, don’t feel confined by the instructions at all – Instead, think outside the box and make something within your wheelhouse of comfortability, be it complex or simple.
- The idea here is not really about getting stuck into “building the perfect screen”, rather, we should be focused on “getting the screen built” (simply) so that we can move onto using it ASAP 😉
If you already have a screen to use, then feel free to skip this step.
Making The Screen
First, we need to gather some materials for our frame…
Necessary Gear:
- *4 x Strips of wood.
- **1 x Piece of wire mesh.
- ***A Staple Gun.
- ****Wood Glue.
*Try to find some wooden strips that are at least 5mm thick and 2cm – 4cm wide. The length of these pieces of wood will determine how large your screen will be and is ultimately up to you to decide on. You might be able to find something like this lying around your home workshop (if you’re the DIY type), otherwise, you’ll surely get sorted out promptly at your local hardware supply store. You do not “have to” use wooden strips if you don’t want to, they can be substituted with pieces of bamboo if you like, or something similar that can provide the supporting frame for your screen.
**You will need to get your hands on a piece of wire mesh that will act as the “trellis” centre of the screen. How much mesh you will need will be based on how large your frame will be, which is obviously determined by the size of your wooden strips once assembled, and again, this is completely up to you. Finding a viable piece of mesh at home might be a bit of a stretch, but you never know… If on-site procurement is not an option, don’t panic, the local hardware store will have you covered here too.
***I recommend the use of a staple gun because they seem to be fairly common in households these days. Technically speaking, you don’t have to use/buy a staple gun for this project; there are plenty of different adhesives, tools and methods that you can apply to ‘fix the mesh in place’ on the frame.
****This is pretty standard stuff, which can be found in most chain stores… It will likely be called different names depending on where you are located… If you do not have any suitable glue at home that you believe will get the job done, then it would be best to pop over to the nearest hardware supply store and ask for assistance. Although, as mentioned before, you might even find some at your local convenience/chain store given it is a commonly used consumer adhesive.
Building The Screen
Now that we have our gear on hand, let’s get started on building the screen!
Step 1) Lay the strips of wood down on a flat surface so that they form a rectangular shape – this will make up the frame for your screen. Next, fix the pieces in place with some wood glue and let the glue set “set” for the time recommended on the package/tube. Screws or nails could be used as a substitute for the adhesive – Remember: you are encouraged to modify the design/method to best suit your personal acumen.
Step 2) Once the frame has been assembled, we need to attach our wire mesh. If you managed to calculate how much mesh you needed accurately, then it should fit “flush” on top of your wooden frame. Lay the mesh accordingly and fix it in place by stapling it to the wooden frame using your staple gun.
Excellent, now all that we need to do is mount the screen and then we can move on to the actual scrog training method.
Mounting The Screen
With the construction chores accomplished, it’s time to secure your screen above your plant(s). The key idea here is to have the screen mounted at a height suitable for where you would like your canopy to be produced. Of course, the height that you opt to mount your screen at and “how” the screen is mounted depends heavily on the available grow area and layout that you are working with.
You might want to build support-legs so the screen can simply ‘stand’ over your plants, or you may even decide to countersink some wire/small chains to hang the screen from above instead. Some growers prefer to mount screens into their grow cabinets, sort of like “floating shelves”… However you decide to move ahead with this process really does depend on the growing space and setup – Whichever route you decide to go down, just be certain that the screen itself is ‘stable’… The last thing that you want halfway through your grow is to have the screen fall over!
Feeding The Screen / Weaving The Weed
Remember to keep in mind that topping or fimming your plant(s) before commencing with this training method is highly encouraged, especially if you would like to further enhance the size of your overall yield.
It is also worth noting that your plant should be kept in a vegetative state during the training process – the longer you can keep this up for, the better your results will be (within reason of course!).
The scrOG process is relatively simple; all we need to do in the beginning phase is to let our plant(s) grow up to the point where they reach the screen. Once your ladies have reached the horizontal trellis it’s time to start “feeding the screen”. The main concept to keep in mind when scrOG training is to do your best to spread the plant as evenly across the screen as possible – This even distribution ensures that you end up with a nice, lush (and flat) canopy.
Stay on track with the vegetative growth light cycle, along with “feeding the screen”, for as long as possible – or until you feel you have achieved the canopy size that you wanted.
Clearing Out Foliage Below The Screen
You might also want to clear out some, if not all of the foliage underneath the screen. Pruning off the leaves (and some smaller stems) helps to promote better airflow below the canopy, while influencing larger bud growth above the canopy. Be ready to say goodbye to those pesky popcorn buds, and hello to a whole bunch of chunky colas 🙂
You could go all the way, with a process referred to as “Lolly Popping”. Alternatively, for a more conservative and arguably better approach, you may consider merely “defoliating” your plants instead.
- Defoliation: The process of removing foliage (fan leaves) from the plant, leaving stems and crown node foliage intact.
- Lolly Popping: The process of removing the foliage and stems alike below the focal growth (canopy) of the plant, leaving only the main stem(s) intact.
That’s pretty much it… When you are happy with the size of your canopy, then simply switch over to a 12/12 flowering light cycle and watch those big juicy buds grow!
Final Remarks
Overall (besides for the building aspect) this is actually one of the more simple mainstream cannabis training methods to engage in. It is also especially useful to those who are restricted by smaller grow areas, or can only legally grow a few plants at a time – The increased yield per plant can be significant, while the space needed is reduced!
With no lack of benefits when it comes to using the screen of green training method, I decided I would just recap a few of my favourite advantages:
- We get the opportunity to be way more “hands-on” with our plants.
- Smaller plants are able to produce larger yields in more modest grow spaces.
- There won’t be any lower hanging pop-corn buds, only large/main colas.
- Airflow below the canopy is improved significantly.
- Canopy control is thoroughly optimised.
Before I tie up here, I just want to remind you that many common items can be used to create a scrog setup, you might even be able to find something that is suitable to act as a fully built screen – Think outside the box, recycle your old stuff!
Thanks for reading, my fellow nuggies 🙂 Be sure to catch the next edition to this series which will be covering some of the basic points behind pruning.




i am so satisfacted.my english is poor, sorry :). thx for approving my user greetings wally
No problem 🙂