



 Staff Writer
 Topping cannabis plants has been known to offer major advantages such as maximizing the usage of available grow space and increasing the overall yield, with some growers claiming that it can even help improve potency levels.
If you, like many other growers, have limited space to cultivate in and you still want to push your plant to its limit, what are your options? Is it even possible?
The answer is YES 🙂 It most certainly is possible, in fact, there are quite a few ways of going about it!
This is where “cannabis training” techniques come in handy, ultimately allowing for better optimization of the available grow area and therefore significantly increasing the yield.
So, without any further ado, let’s jump in with our first of six cannabis training methods to come:
Cannabis Plant Training Technique #1: Topping
I resolved that we should kick things off with one of the more prevalent cannabis training methods, called ‘topping‘. The rationale behind why I consider this to be the perfect starting point is simple – topping your cannabis plant does not require any comprehensive knowledge, or specialized tools – Just some stuff lying around the house will do!
What is Topping, And Why Do It?
In essence, topping refers to the process where growers cut the “tops” off of their cannabis plants.
When a cannabis plant is topped, the affected area heals over and the wound site is attended to by a plant hormone that influences horizontal growth patterns, this effectively overrides the other hormones dedicated to the promotion of vertical dominance. The result causes the two horizontally angled stems (growing directly below the area where the plant was cut) to turn into main stems.
Topping cannabis plants has been tried and tested for many years by new and seasoned growers alike, producing great results in both private and commercial grow operations.
In addition to its more famed attributes such as better utilization of space and larger yields, topping has likewise been regarded by some growers concerning improved potency levels.
While there are no future growth possibilities left for the area of the plant that got cut (nothing will grow out of the wound site), we are left with two main stems instead of one, and instead of growing straight up, we now have a more horizontal growth pattern forming.
This means that with the use of topping, growers can start to take strains that are known to be “tall and lanky”, and “train them” into shorter wider plants.
Having a wider, more evenly distributed cannabis plant can help tremendously when it comes to evenly exposing it to light. Ultimately, we want our plants to be able to harvest as much sunlight as possible during each day so that we can maximize growth, achieve higher potency levels, and get more substantial yields.
How To Top A Cannabis Plant
Before we get started on topping your cannabis plant, we first need to examine how far along the growth cycle it is; Your plant should not be topped until it has at-least 5 developed node sites. This ensures that there is enough growth available to help the plant successfully bounce back during the healing process.
What Is A Node? Nodes are points on the plant’s main stem that support side shoots.
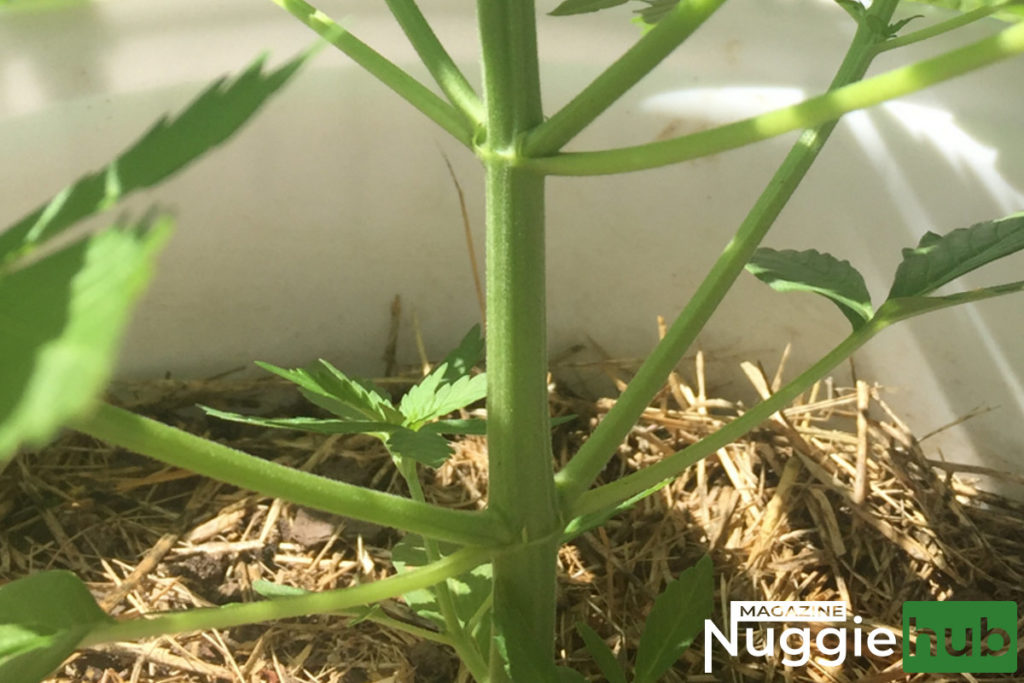
When examining your plant(s) node points, you should find yourself in one of 3 the situations below:
Situation 1: Not Enough Node Points
If you find that your cannabis plant has not yet developed at-least 5 nodes, then I’d strongly advise that you wait until it has done so.
Although, we are ever interested in stories from our community about their grows and experiences, so, if you do happen to venture “outside the box”, please do drop us some feedback about how it goes!
Even if this is the situation that you find yourself in, it is still worth reading forward. The information to follow will certainly help you to better prepare for the process ahead.
Situation 2: Too Many Node Points
On the other hand, if you are in a position where you have way more than 5 developed node points then you are still good to go, in fact, you actually have an opportunity to get more out of this venture than initially expected – by taking a clone of your cannabis plant!
Cloning cannabis is a topic that deserves its own dedicated article, so I won’t go on about it here, just know that it’s pretty sweet and worth your time to read about!
Situation 3: The Perfect Amount Of Node Points (5)
You may have already read this article (or an article similar to this one – probably not as awesome though.. ;)) and have been watching the growth of your cannabis plant carefully in anticipation of finally getting to top it, or perhaps, by pure chance you are happening to read this article at just the right time. Either way, you find yourself in the position where your plant has 5 developed node sites.
This is like the ‘Goldilocks Zone’ of cannabis plant topping – it’s pretty much the perfect time to move ahead unless you plan to take a clone from your plant, in which case it would be best to let a few more nodes develop before you continue.
Time To Get Toppin’!
Once you are happy with the number of nodes that your cannabis plant has grown it is time to start topping.
What You Will Need:
- 1 x Pair Of Scissors / Sheers (The Sharper The Better)
If you really don’t have a pair of sharp scissors or sheers lying around the house, then you can find something else to make a clean cut – I have heard some success stories from growers that used “nail clippers” to top their plants, many of which now swear by the exclusive use of this under-glorified tool; purely because it has the ability to deliver a good clean cut at close range.
I do not recommend using a knife for this. If you do, you run a fairly high risk of hurting yourself and/or damaging your plant in the process. It is not worth the risk, don’t do it!
The Process
If you have made it this far then you are doing well, and best of all, you are ready to top your cannabis plant – Congratulations!
Take a look at your plant’s node points and count up from the bottom to find the 4th one, you will want to cut the main stem just after (above) this node point – well before the next (5th) node point if possible.
Remember: try to make this cut as clean as possible, regarding both the execution of the cut itself, as-well-as the sterility of the tool(s) being used. This is very important!
That’s it! You have officially topped your cannabis plant 🙂 Now give her a few days and watch how the two side stems take on the role of main stems – Keeping her short and bushy!
Final Remarks
I would not advise topping higher or lower than “just above the 4th node” point. topping your cannabis plant too low down (3rd node and below) will likely not leave the poor girl with enough growth to effectively bounce back, which could end up over-stressing it. On the other hand, topping your plant too high up (5th/6th node point and above) may leave you with an unbalanced plant, making it more difficult to maintain as time goes on.
Something else that is worth noting before I tie things up for part one of this series: Topping can be performed multiple times




GIPHY App Key not set. Please check settings