



 Staff Writer
 Well, now, the question really should be; Which method would be best for the seed that you have, and the environment that you are attempting to germinate in?
Okay so as you probably know by now, there are many ‘tried and tested’ methods for successful cannabis seed germination. So, which method is best for you? Well, now, the question really should be; Which method would be best for the seed that you have, and the environment that you are attempting to germinate in?
That’s right, the strain you have on hand as-well-as the environmental factors around you are going to play a role in determining which method would be best suited for your next grow.
The course I find most successful is the ‘presoak and plant’ method. This procedure can be tailored to best suit your strain, which will give you a better chance of successful germination. This is the method that will be covered in this article. Note that there are many ways to pop your beans, so don’t worry if this approach is not for you, we will be posting more methods as time goes by.
So, where do we start? Okay wait a sec, I know what you’re thinking… “why am I reading a ‘how-to article’ that already has me asking more questions than I started off with, WTF?”…
Don’t panic, I have done my best to write some guidelines down below, so grab some coffee and a blunt (assuming cannabis is legal where you live) and let’s get started.
A Place To Begin
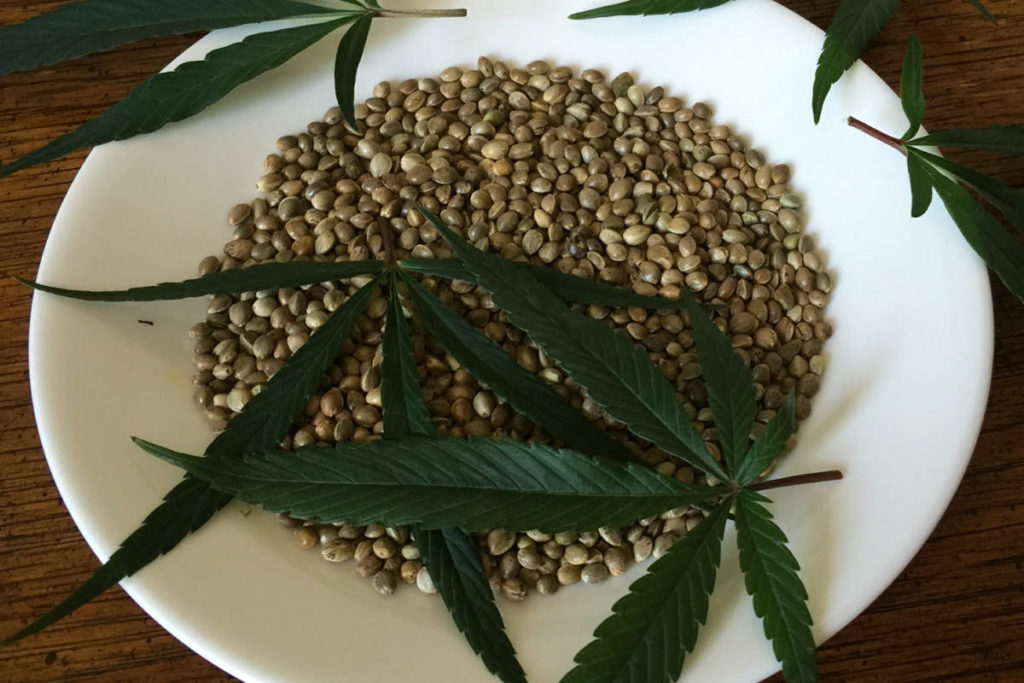
The best place to begin is to start researching, so crack open a new tab (if you’re a geek like me with a surplus of screens, pass this tab to the left 😋) and get your Google-fu on!
Ideally you’d want to do as much recon as possible here, not solely for the sake of having a successful and healthy germination – If you can get a good start on knowing your plant before it is born, then you can have a better shot at raising it properly, furthermore it also gives you an opportunity to keep ahead of the educational curve as the plant gets older.. Just like reading a baby book I suppose. Anyways ‘rant over’, let’s get back to sprouting some sweet herb… Please don’t lose your buzz
You might be wondering why it is worth researching the strain/s that you are about to plant, I mean, the description that the breeders had for the seeds where mouthwatering, and the strain name sounds awesome, right?? Well, yeah, I get that 🙂 but… as cool as all of that is, there are some very real factors to consider, such as where the seeds where bred (geographically), as-well-as the strains that where crossbred to create the strain/s that you have now (ie. your seed’s parents).
Knowing the geographic origins of where your seeds where born will help you to better recreate the natural environmental factors (within reasonable parameters) at your own grow location. Although cannabis can be a fairly hardy and resistant plant, it is notable that certain strains are better adapted to their specific environments of origin… Just sayin’…
Another beneficial attribute to learn whilst you Google-fu the $&@# out of your strain(s) is; the typical ‘shell thickness’ of your seed. Yip, it varies from strain to strain, and even from batch to batch occasionally with the same strain. What’s worth figuring out here, over-and-above anything is; does your seed have a ‘thick shell’? If it does, it might require some assistant getting its tap root out of the shell during germination. This happens to be the case with many cannabis strains and is a large reason why newbie growers have a poor germination rate.
The Next Step

Once you are comfortable with the knowledge that you have ascertained in the previous phase of this journey, it is officially time to move away from the internet and toward the seed itself, in like, the physical world… I know, it’s hard… but we believe in you!
Chores And Stuff…
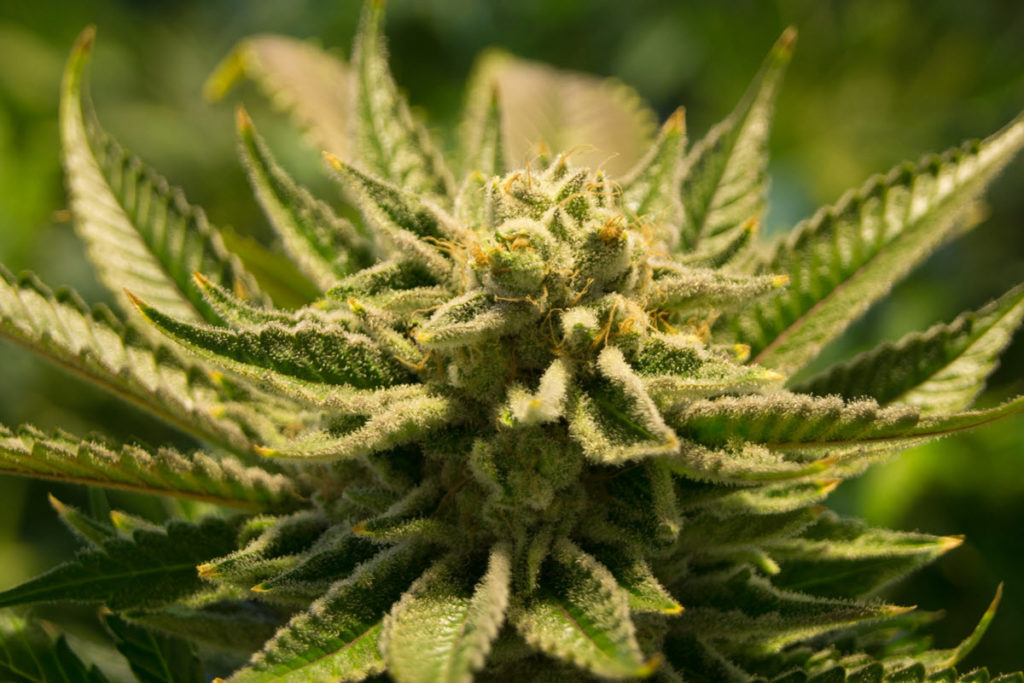
Successfully germinating cannabis seeds is not only about having a black-belt in Google-fu, there are also some chores to do, and some stuff to get… but don’t stress, if you don’t feel like going out to hunt for supplies in the wild (personally I have little enjoyment for shopping centres too) then it is likely that you can make this mission happen using your skills of ‘on-site procurement’. Nevertheless, regardless of how you decide to gear up, this is the list of items that you will need to move forward:
- At least 1 x Cannabis Seed.
- Don’t judge me, just covering my bases..
- Some dechlorinated water.
- +/- 25ml per seed should do it (enough to fill a shot glass).
- 1 x shot glass per seed.
- I am not a fan of plastic, so if you can; I would recommend using glass.
- 1 x 8cm by 8cm piece of aluminium foil, per seed.
- 1 pair of tweezers.
- 1 x seedling pot per seed.
- Enough seedling mix to fill each pot.
- Thermometer.
Putting It All-Together, And Cracking Those Magic Beans!
The moment has dawned upon us, we are going to take all of our research, and our gathering skills and have them pay off by successfully germinating our cannabis seeds. After which, we will safely land them in their seedling pots. Let’s get to work!
Cover ‘Em Up
Start off by placing each shot-glass onto the centre of its designated piece of aluminium foil, and carefully fold up the foil so that it completely covers the outside of the shot-glasses. Leave a portion of the foil ‘unfolded’ at the top of each shot-glass – this excess foil will be used as a ‘lid’ later on by folding it over the top.
Fill The Vessels
Next up, we fill each shot glass with its portion of dechlorinated water, leaving a reasonable gap at the top so that you can easily manoeuvre the vessel without spilling.
Check Your Temps
Now that you essentially have a light-proof container for each of your cannabis seeds, filled with water that has been dechlorinated, we just need to check the temperature of the water in the glasses, and then it’s time to get soaking! So whip out the ol’ thermometer, and check out the temperature of your water in each shot-glass. If the temperature value is between 21°C–32°C (70°F–90°F) then you are good to go. If you don’t have a thermometer ‘just lying around’… you should probably go out get one, it is a very useful instrument to have around the house.
Research shows that a good average temperature to aim for is 26°C (78°F), however, cannabis seeds do tend to germinate best under their ‘native’ conditions – remember all that research I had you do earlier?
If the temperature of your water is above or below the aforementioned range, then you will have an array of issues preventing germination from taking place.
Soak Your Seeds
With the shot-glasses fully prepped, it is time to get soaking… finally!
Drop a seed in each shot-glass, and cover the top with the excess aluminium foil to completely block out any light.
Check Periodically (Don’t Forget!)
It is crucial that you remember to regularly check your cannabis seeds during the soaking phase, or you might end up drowning some (or all) of them. Certain cannabis seeds have been known to sprout early (anywhere between 12 to 24 hours) using this method, so be sure to check-in on them often. Also, keep in mind that the darker the environment the better, as cannabis seeds need darkness to initiate germination.
Do not soak your seeds for longer than 24 hours, this will likely lead to oxygen deprivation, which will kill your seedling(s).
Why soak your cannabis seeds?
The germination life cycle of cannabis seeds is driven by an array of hormonal responses, these hormones (cytokinins, gibberellins, and auxins) are located in the durable outer shell of the seed, and are triggered by the right combination of air, moisture, heat, as-well-as a lack of sunlight. Hence the use of our water, thermometer and tinfoil respectively.
In nature, most seeds (cannabis seeds included) tend to use moisture levels as an indication of whether it is an optimal time to grow or not, soaking seeds in water at the correct temperature can help kickstart this process, and is an old farmers trick…
Soaking cannabis seeds can also help promote shell softening, which is a major aid for strains that have been known to produce outer layers that are thicker than usual,
Some cultivators also swear by a process called ‘scarification’ which helps to promote a higher germination rate – Scarification is basically just a process where the grower ‘nicks’ the outer shell with a sharp knife, or fine grain sandpaper, etc. The goal of scarification is to improve the ability for the water to penetrate into the cannabis seed’s shell, which in turn can speed up the germination rate.
Prepare Your Seedling Pots
While your cannabis seeds are soaking, you can move on and start preparing the seedling pots that they will start their growth phase in. This is a slightly more complex process than what we have dealt with up to this point, but again, don’t panic, we have you covered with some guidelines below.
Pro Tip: Fire up another blunt, and make some more coffee before burning through more of this article 🙂
The Right Cannabis Seedling Mix
This is a very easy subject to have an argument over, many cannabis growers will boast that they have the best/right seedling soil recipe, plenty of which tend to differ significantly from one another, not only in ratios of materials used but also what materials get used.
I am not going sit here and claim to have the holy grail when it comes to cannabis soil recipes, instead, I will let you know what I find makes sense to me, applying Occam’s Razor to the situation and therefore satisfying my personal preference of keeping things simple.
Ingredients
- 1 Part Coco Coir.
- Sold at most pet & horticulture shops.
- 1 Part Outdoor Soil.
- Look for dark soil with lush vegetation surrounding it. Earthworms are another positive sign of soil holding good nutrient value.
- Seedling Fertilizer. (optional)
- Buy organic fertilizer, or make your own compost tea (recipes coming soon)
The Mix
This mix couldn’t be more simple – combine the Coco Coir with the Outdoor Soil, ending up with a 50/50 mixture of the two. Once the fundamental mixture has been created, you can move onto adding the seedling fertilizer.
How much fertilizer you should use in your mix depends on which seedling fertilizer you decided to buy, and how rich in nutrients your outdoor soil is. Cannabis plants typically don’t need much help at all during the first few weeks of their lives, in fact, fertilizer is often ‘too strong’ for cannabis seedlings and can actually result in burning the plant(s). With this in mind, I would recommend diluting the fertilizer mixture to 25% of the original recommendation made by the fertilizer company.
A nice rule of thumb to follow (provided you found some decent soil) is to hold off on adding the nutrients (i.e. fertilizer) until after the fifth set of true leaves have formed on your plant(s). The nutrients stored in the seed, as-well-as within the Cotyledons (the first leaves) should keep things covered up until (or even beyond) that point.
Some Advice About Organic Fertilizer
If you can, you should consider the positives of either purchasing or making your own organic compost tea. This will help you to regulate what gets fed to your cannabis plants, avoiding toxic chemicals and making for a better growing experience all around.
Soil Moisture Level
!!! EDIT THE BELOW. AS IT WAS WRITTEN WHEN YOU WHERE SLEEPY…
Maintaining the correct moisture levels in your soil is critical for cannabis seedlings to get a good start. Cannabis seedlings tend to suffer negative effects from both under and overwatering, with overwatering being the worst (and most common) of the two.
In a sense, what you want is for your seedlings to have constant access to water and nutrients, yet you don’t want to cause root rot and/or drown them. This is what makes our soil mix so convenient, it is loaded with Coco Coir which is known for its water and oxygen retention attributes, making it much more difficult to overwater or underwater your cannabis seeds during germination.
Correct Temperature Range
Recommended temperature ranges can vary between cannabis strains, and is mostly determined by the ecology of where they were grown. The most common temperature range that seems to suit most cannabis strains happens to be between 22° and 25°C (or 71–77°F, for those who cannot handle the metric system).
If it is too cold where you are situated, you may consider investing in some heating pads, as they can be a relatively cost-effective solution. Just be careful and mindful when putting together your set-up, if configured incorrectly this could easily turn into a fire hazard or even result in fatal electric shock.
Correct Humidity Level
High humidity levels are ideal for germinating cannabis seeds. A humidity range between 70% and 90% is recommended to best facilitate successful cannabis seed germination.
High humidity levels can be achieved by placing a plastic bag over your seedling tray(s) or pot(s). As time passes (given your temperatures are not too cold), you will notice that the water from the moist soil evaporates and then stays inside the bag, ultimately raising the humidity level.
Transferring From Vessel To Pot
After your cannabis seeds have been soaked, and you have finished preparing your seedling pots, it’s finally time to transfer your babies into their new starter homes. Yipppee!!! 🙂
A Quick Word regarding Cotton Wool / Paper Towel
Before the crowd gets too antsy, I know what you are thinking… why am I not putting the soaked seeds into cottonwool or paper-towel first? Don’t worry, I will explain 🙂
Granted, this is a commonly practised step in germination of all types of seeds and is advocated by many cannabis growers as a way not only to shorten the length of time taken to germinate the seeds but also to increase the overall germination success rate, particularly when it comes to cannabis seeds. I don’t deny the significance of that, at all.
The reason why I suggest skipping this step altogether is because of the micro root hairs which tend to grow into the cottonwool or paper-towel after the seed pops and the taproot makes its way out of its shell. The only real options you have after this is to plant the cannabis seedling with its cottonwool/paper-towel or to literally tear the seedling away from what it is holding onto. Neither of which are ideal scenarios as both messes with root growth and the latter may even end up turning your cannabis plant into a hermaphrodite later down the road.
Okay, so that’s my explanation, now, back on point… We are taking our pre-soaked cannabis seeds and we are going to plant them directly into their prepared seedling pots.
Be Careful!
If you happen to experience an early pop in one or more of your cannabis seeds (on occasion certain seeds have been seen popping during the soaking phase), or if you decided to ignore the previous advice regarding the cottonwool/paper-towel, then it is in your seedlings best interest that you take care with this next step.
The seedlings taproot (and all its fine little hairs) are very sensitive – if disturbed, it will likely lead to disruption in your plant’s growth patterns, and even carry the possibility of turning the cannabis plant into a hermaphrodite later down the road. Imagine how bummed you will be if you put in all that effort, later on, only to discover that a rookie error that you made much earlier in the growth has come back to bite you in the ass…
Not To Shallow, Not Too Deep – Just Right!
Start by boring a small hole into the centre of each seedling pot, around 5mm to 10mm deep, and a few mm wide (wide enough for the seed to fit). Make sure you do not compact the soil too much when doing this, as cannabis plant roots may have trouble breaking through more solid soil which in-turn will affect the growth rate of your future babies.
Tweezer Time
Once you have finished heroically boring the holes for your seedlings to rest in, it time to finally make the transfer from the vessel to the pot. Grab your trusty tweezers and carefully (yet majestically) remove each seed from their designated vessel descending them into their freshly bored holes practising equal care and finesse.
The Right Way Up Is Down!
Now, I know this to be another controversial subject, but I am going to go there anyway 🙂 I believe in planting cannabis seeds ‘upside-down’, with the taproot pointing upward. When planted this way, the cannabis seed will grow their taproot into the side of the tunnel that you bored, and sort of ‘flips itself over’, breaching the soil… like a glorious little baby weed whale…
looking at the shape of the cannabis seed, you can note that there is usually a ’round side’ and a ‘pointy side’, the pointy side is where the taproot will come out. keeping in mind the shape of our seed, now try to envision how it may fall down to the ground – It makes sense that there is a significant chance of the pointy side of our cannabis seed left sticking up.
Either way, roots are influenced by gravity, typically referred to as geotropism. This basically means the roots will (in most cases) find their way downward. The stem, on the other hand, is influenced by negative geotropism which helps it find its way upward. Thereafter, once the cannabis plant has breached the soil, it would be influenced by something called phototropism, which is the plants’ orientation in response to light.
Plug The Holes
Okay so now you have your cannabis seed placed carefully into its designated hole, and its time to plug the top with a bit more soil. This part is difficult to explain in a way that is not already overly obvious, so I will just leave you with this one tip: be sure to avoid over-compacting the top of your seed, this will inhibit growth to some extent, and in some cases might lead to failed germination, but other than that, it is pretty simple to get past this step.
Be Attentive And Patient
Nice, if you have made it this far then you are done with the planting phase, and now it is time to maintain the right temperatures, humidity levels and moisture levels. Be attentive, yet patient, your seedlings will breach the earth soon, do not go digging into the soil in search of them, this will ultimately only slow the germination process down, and perhaps even damage your seedling.
Now I know that you are getting fidgety already… again, don’t panic, I have a general timeline below that should give you an idea of how long this phase takes. Remember that this is just a ‘general’ timeline, your plants may germinate either faster or slower depending on the environmental influences within your own setup, or based on the cannabis strain that you have decided to germinate.
General Timeline For Cannabis Germination
Rewrite this all:
1 – 4 Days
Between day 1 and day 4 water is absorbed by the cannabis seed and the radical (root tip) pops through the outer shell, this time taken is influenced by the available moisture around the cannabis seed.
5 – 9 Days
As the next few days pass by, the taproot would grow downward and the stem upward. If the cannabis seed was not planted too deep, the soil was prepared properly, the temperature and humidity levels maintained, and the roots were not disturbed during or after the process of planting the seed, then you could expect your seedling to breach the soil within 5 – 9 days.
10 – 14 Days
If all is going according to plan, your plant’s roots should start growing out of the taproot, with root hairs to follow between 10 – 14 days after initiating germination of your cannabis seed.
15 – 21 days
It is fair to expect your plants to be rooted anywhere between day 15 and day 21… most cannabis seeds will be rooted within 3 weeks, again provided the correct care was taken during germination of the cannabis seeds.
Exploding Into Vegetative Growth
After cannabis seeds have established their roots, or have become ‘rooted’, cell growth rapidly accelerates, which in-turn affects rapid stem, foliage and root development. this is known as vegetative growth. Most cannabis seedlings should develop into vegetative plants within 4 to 6 weeks after initiating germination.



GIPHY App Key not set. Please check settings